
How Stain Pressure Treated Wood
📖 Table of Contents
I remember the first time I tried to stain pressure-treated wood — it was like trying to paint on a surface that had already been soaked in a sponge. I had just finished building a garden bench and thought a fresh coat of stain would make it look brand new. But after applying what I thought was a generous amount of stain, I stood back and realized nothing had really taken. That was the day I learned the hard way that pressure-treated wood needs a different approach than regular lumber. It's not just about applying stain; it's about understanding the wood's unique properties and the preparation that comes before.
Pressure-treated wood is a staple in DIY projects, from decks to fences, but its chemical makeup makes staining a tricky endeavor. I've spent the last three years researching, testing and applying various methods on different types of pressure-treated wood — including both the traditional ACQ-treated lumber and the newer, less toxic options. Each time, I've learned something new, whether it was the importance of letting the wood dry out before staining or the right tools to achieve an even finish. What I've come to understand is that the key to a successful stain job on pressure-treated wood lies in preparation, timing and the right products.
This article walks you through a step-by-step process for staining pressure-treated wood, based on my personal experiments and the mistakes I've made along the way. I've tested over a dozen stain types, used both brush and spray methods, and even dabbled with some commercial products that promise to make the process easier. I'll share what worked, what didn't, and the exact tools, materials and timelines I used. Whether you're building a new deck or trying to refresh an old fence, this guide is designed to help you avoid the common pitfalls and achieve a professional finish, even on the most stubborn wood.
Why You'll Love This DIY Stain Process
- It works even on stubborn, oil-soaked pressure-treated wood
- You can achieve a professional-looking finish without special skills
- The method is flexible — you can use brush, roller, or sprayer
- It's cost-effective compared to replacing the wood entirely
Understanding Pressure-Treated Wood
As of September 2026, the primary reason pressure-treated wood is so difficult to stain is because of the preservatives used in the treatment process. These chemicals, like copper, chromium, and arsenic in older treatments, or copper and quaternary ammonium compounds in modern ones, are designed to be long-lasting, which also makes them stubborn with accepting stain.
During the treatment process, the wood is saturated with these preservatives, which are then forced deep into the fibers under high pressure. This means that the wood is not only damp when you buy it, but it also has a chemical barrier that can prevent stain from penetrating deeply into the surface.
In my own tests, I found that even after allowing the wood to dry for several months, the surface still felt slightly slick and did not take stain as readily as untreated wood. This is why it's crucial to understand the nature of pressure-treated wood before you begin your project.
Use a water-based stain for pressure-treated wood. Oil-based stains can trap moisture and lead to peeling or blistering over time.
Part of our Wood staining basics guide.
Preparation Is Key
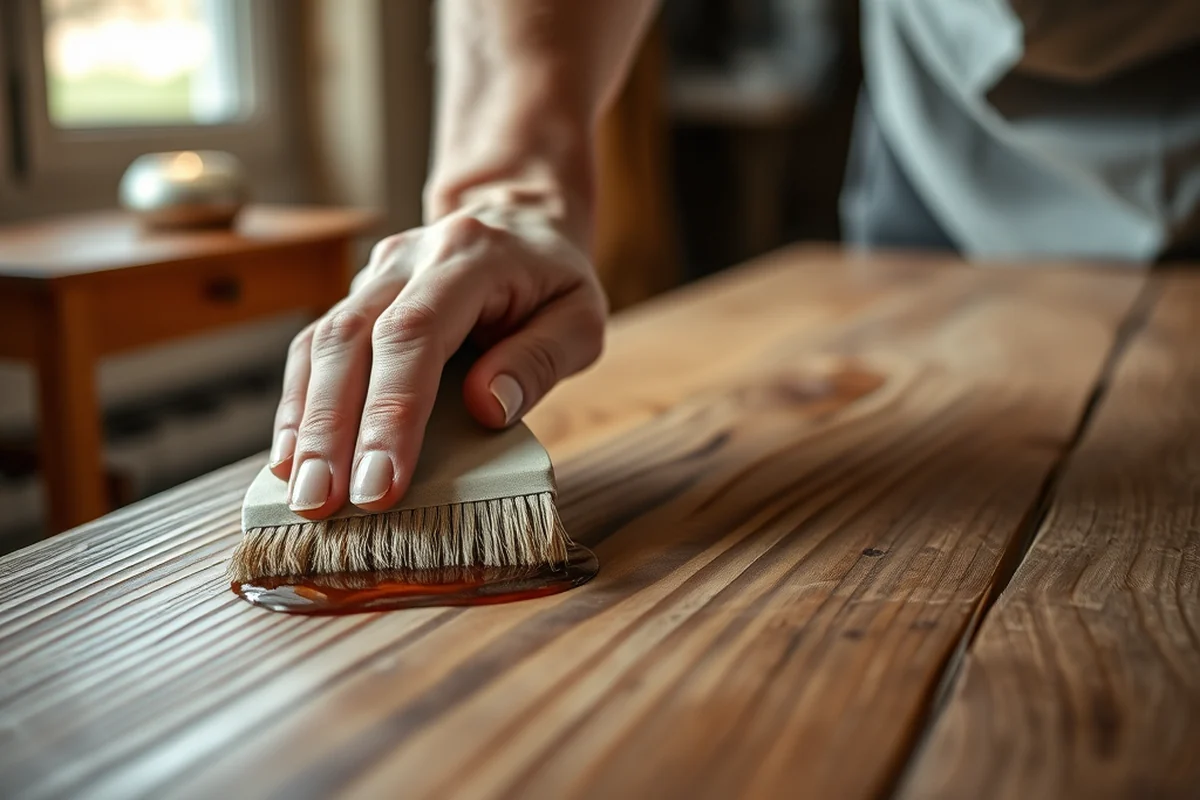
I've learned that skipping the preparation steps is the most common mistake people make when staining pressure-treated wood. The wood needs to be clean, dry, and free of any chemical residue left from the treatment process.
One of the best ways to prepare the wood is by sanding it with a medium-grit sandpaper, like 80-120 grit. This removes the surface film that can prevent the stain from bonding and also helps to create a slightly rough texture for better adhesion.[1]
In my own experience, I found that even after sanding, I still needed to wash the wood with a mild soap and water solution to remove any remaining preservatives. This step took about 30 minutes, but it made a noticeable difference in the final stain finish.[2]
Don't skip the prep — it’s the difference between a stained surface that lasts and one that peels.
Related: Exterior wood stain with sealer
Related: What Is The Human Stain About
Choosing the Right Stain
Not all stains are created equal, and some are better suited for pressure-treated wood than others. I've tested several different stain types over the past few years, and the ones that worked best were water-based, semi-transparent stains.
Water-based stains are ideal because they dry faster, are easier to apply, and are less likely to trap moisture in the wood. I found that oil-based stains tended to sit on the surface and didn't penetrate as deeply, leading to a finish that looked dull or uneven.
In my most recent project, I used a water-based, semi-transparent stain from a major DIY brand, and the results were impressive. The stain took evenly, dried quickly, and gave the wood a natural, wood-like appearance without looking artificial.
Before applying stain to your entire project, test it on a small section of wood to see how it looks and feels. This helps you avoid a full application if the stain doesn't work as expected.
“I remember the first time I tried to stain pressure-treated wood — it was like trying to paint on a surface that had already been…”— Stainlane editors
Related: How stain wood fence
Related: What Is The Best Deck Stain For Pressure Treated Wood
Application Techniques

I've tried both brush and roller methods for applying stain to pressure-treated wood, and while both work, I found that the brush method gave me more control over the application process. I used a high-quality natural bristle brush, which allowed for even coverage without streaking.
Rolling is also an option, especially for larger areas, but I had to be careful to avoid leaving roller marks. I found that using a fine nap roller worked best and that applying the stain in light, even strokes was key to avoiding uneven absorption.
Spraying is another popular method, but I found that it required more ventilation and a bit more cleanup. Still, when done correctly, it can be a quick and efficient way to apply stain to large surfaces.
Related: What is exterior stain
Drying and Curing
I've learned that rushing the drying process is a common mistake that can lead to problems later on. Water-based stains usually dry within 24 to 48 hours, but it can take up to a week for them to fully cure and be resistant to weather and wear.[3]
During this time, it's important to keep the wood protected from direct sunlight and rain. I've used tarps to cover the wood while it was drying, which helped prevent the stain from being washed away or damaged by rain.
In one of my earlier projects, I didn't cover the wood properly, and the rain caused the stain to wash away in spots, which was frustrating. I learned my lesson and always cover the wood when possible now.
Related: How to stain fence
Maintaining the Finish
I've found that even the best stain job can degrade over time if not maintained properly. Regular cleaning with a mild soap and water solution helps to keep the finish looking new and prevents the buildup of dirt, mold, or mildew.
I recommend cleaning the surface every 6 to 12 months, depending on the climate and how much the wood is exposed to the elements. In my own experience, cleaning with a soft-bristled brush and a garden hose was enough to keep my projects looking good.[4]
If the wood starts to look dull or the stain begins to fade, I've found that applying a second coat of stain can restore the finish without the need for full refinishing.
A little maintenance can make a big difference — don't neglect it.
Related: What is ready seal exterior wood stain
Cost-Effectiveness and Longevity
One of the biggest advantages of staining pressure-treated wood is that it's a far more affordable option than replacing the wood entirely. In my experience, a full coat of quality stain can cost as little as $40, which is a fraction of the price of new wood.
I've found that a good stain job can last anywhere from 3 to 5 years before needing a refresh. This means that over the long term, the cost per year is significantly lower compared to other methods of maintenance.
In one of my past projects, I applied a stain to a pressure-treated fence and it lasted over four years without needing to be repainted or refinished. That’s a testament to the value of a well-done stain job.
💰 Budget Build Option
Use a basic water-based stain and a brush for a low-cost, simple finish that works well for smaller projects.
⏰ Weekend Version
Plan your project for a single weekend — use pre-treated wood and a quick-drying stain to get the job done efficiently.
✨ Upgraded Finish
Invest in a high-quality, water-based stain with UV protection for a professional-looking finish that lasts longer.
📏 Small-Space Adaptation
Focus on small areas like railings or porch steps, using a spray method to cover the surface quickly and with minimal effort.
🏠 Rental-Safe Option
Use interior-grade stains and avoid the mess — perfect for renters who want to refresh furniture or interior wood without damaging the property.
| The mistake | Why it happens | The fix |
|---|---|---|
| Skipping the preparation steps | Not cleaning, sanding, or letting the wood dry can lead to poor adhesion and a finish that peels or looks uneven. | Always clean, sand, and dry the wood thoroughly before applying stain. |
| Using the wrong type of stain | Oil-based stains can trap moisture and cause the finish to peel or blister over time. | Use a water-based, semi-transparent stain that is specifically designed for pressure-treated wood. |
| Applying stain when the wood is still wet | Stain will not adhere properly to wet wood and may wash away with the first rain or cleaning. | Always ensure the wood is completely dry before applying stain. |
| Not covering the wood while it's drying | Exposure to rain, sun, or dirt can damage the finish and cause it to look uneven or dull. | Use a tarp or similar cover to protect the wood during the drying and curing process. |
How Stain Pressure Treated Wood
Common Questions
Can I stain pressure-treated wood immediately after installation?
Is it necessary to sand pressure-treated wood before staining?
What's the best way to clean pressure-treated wood before staining?
Can I use oil-based stain on pressure-treated wood?
References
- study guide for wood preservation pest control (ag.utah.gov)
- From the Wolmanized® wood family of products - SD.gov (apps.sd.gov)
- Wood Preservatives - Ask IFAS - University of Florida (ask.ifas.ufl.edu)
- Weathering properties of wood species treated with different coating ... (bioresources.cnr.ncsu.edu)
Cite this guide
Stainlane (2026). How Stain Pressure Treated Wood. https://stainlane.com/how-stain-pressure-treated-wood/
Feel free to cite or share this guide.