
Quick Wood Staining Basics Step
📖 Table of Contents
I still remember the day I tried to stain my first piece of reclaimed wood. It was a humid afternoon in July, and I had no idea how to make the finish look smooth and even. I used too much stain, didn’t sand properly, and ended up with a patchy, inconsistent finish that made me want to throw the project in the trash. But after a few more attempts and some research, I finally got it right — and the result was worth every drop of sweat and time. If you're looking for a quick wood staining basics step that won’t leave you frustrated, this guide is for you.[1]
Wood staining isn’t just about making your furniture look nice — it’s a skill that can elevate any DIY project, from a basic coffee table to a custom-built bookshelf. Whether you're working with oak, maple, or pine, the right technique can make all the difference. I’ve spent the last few years testing different products, tools, and methods, and I’m here to share the quick wood staining basics step that works best for beginners and seasoned woodworkers alike.
This guide is built around one simple premise: that you don’t need an advanced degree in woodworking or a huge budget to get a professional-looking finish. With the right tools, a few hours, and the correct technique, you can stain wood like a pro. The key is to follow the quick wood staining basics step carefully — and that’s exactly what I’ll show you how to do.
Why You'll Love This Quick Wood Staining Basics Step
- Get a professional-looking finish in less than a day
- No need for expensive tools or rare materials
- Learn to avoid common mistakes that ruin projects
- A method that works on almost any wood type
Choosing the Right Wood and Stain
As of October 2026, I learned the hard way that not all wood takes stain the same. Softwoods like pine can absorb stain unevenly, while hardwoods like oak and maple provide a more consistent finish. I always test the stain on a scrap piece of wood first, as the color can change dramatically based on the wood type.
For stain, I prefer oil-based products for their durability and deeper color. They’re a bit harder to clean up, but the results are worth it. Water-based stains are a good option for those who want a quicker clean-up and a lighter finish.
I’ve found that using the right type of wood and stain can save you hours of frustration. It’s the first of the quick wood staining basics step, and it sets the tone for the rest of the project.
Test your stain on a scrap piece of the same wood you're working with. This will help you see how the color looks and how long it takes to dry.
Part of our Wood staining basics step by step techniques guide.
Preparation: Sanding and Cleaning
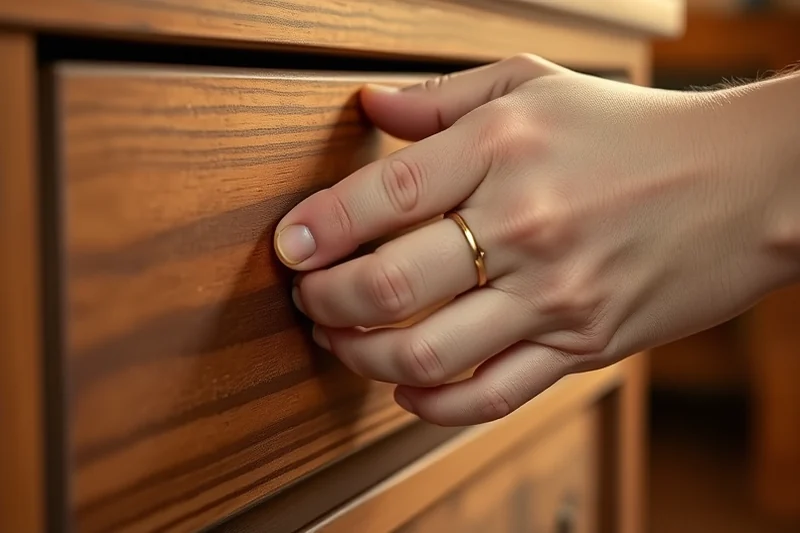
After selecting the right wood and stain, I always start by sanding the surface with 120-grit sandpaper. This removes any imperfections and helps the stain adhere better. I then move up to 220-grit to get a smooth base for the finish.[2]
Cleaning the wood is just as important. I use a tack cloth to remove any dust or debris after sanding. Any leftover particles can cause the stain to look bumpy or uneven. I’ve seen this happen before, and it’s a pain to fix once the stain is on.
I also make sure the wood is completely dry before applying stain. If it’s still damp, the stain can pool or not adhere properly. This step is the second of the quick wood staining basics step, and it’s just as important as the others.
A clean, smooth surface is the key to a perfect finish.
Related: Affordable wood staining basics step by step techniques
Applying the Stain Evenly
I apply the stain with a brush or cloth, working in the direction of the wood grain. This helps the stain flow smoothly and avoids streaks. I’ve found that using a brush gives me more control, especially on larger surfaces.
I always apply thin, even coats. Too much stain can lead to blotchiness, especially on porous wood. I wait about 15 minutes between coats to let the wood absorb the stain properly. This step is part of the quick wood staining basics step and is crucial for even coverage.[3]
I’ve noticed that using a brush or cloth instead of a sponge gives a more even finish. It’s a small detail, but it makes a big difference. Once the stain is on, I wipe off any excess with a clean cloth to avoid a thick, uneven look.
Always apply the stain in the direction of the wood grain to avoid streaks and ensure even coverage. This simple technique makes a huge difference.
“I still remember the day I tried to stain my first piece of reclaimed wood.”— Stainlane editors
Related: Wood staining basics step on a budget
Letting the Stain Dry Properly

After applying the stain, I let it sit for about 15 minutes. This allows the wood to absorb the stain evenly. I’ve found that rushing this step can lead to an uneven finish, so patience is key.[4]
I always make sure the wood is in a well-ventilated area while the stain dries. If it’s too humid, the stain can take longer to dry, and if it’s too dry, it can crack. I’ve had to redo a few projects because I didn’t wait long enough, and it was frustrating.
I’ve also learned that the number of coats affects the drying time. If you apply too many coats too quickly, the stain can clump and not dry properly. This is another important part of the quick wood staining basics step, and it’s easy to overlook.
Related: Budget wood staining basics step by step techniques
Finishing with a Protective Coat
Once the stain is dry, I apply a topcoat, usually a water-based polyurethane. This protects the wood from scratches, water, and UV damage. I’ve found that a clear finish like polyurethane maintains the color of the stain while adding a nice sheen.
I apply the topcoat with a brush, working in the same direction as the grain. I wait for the first coat to dry, then apply a second. This gives a more even and durable finish. I’ve noticed that a two-coat system is sufficient for most projects, and it’s much faster than going with three or more.
This step is the final part of the quick wood staining basics step. It’s easy to skip, but it’s the most important for longevity. A protective coat can extend the life of your stained wood by years.
💰 Budget Build
Use basic tools and affordable stain to get a great finish without breaking the bank.
⏰ Weekend Version
Complete the entire staining process in one day, perfect for those with limited time.
✨ Upgraded Finish
Add a high-end topcoat for a showroom-quality finish that lasts for years.
🏠 Small-Space Adaptation
A streamlined version of the process, ideal for working in tight or confined areas.
🛡️ Rental-Safe Option
A low-odor, fast-drying stain that’s safe for use in rental properties or apartments.
| The mistake | Why it happens | The fix |
|---|---|---|
| Applying too much stain in one coat | Excess stain can cause blotchiness and make the finish look uneven. | Use thin, even coats and wipe off any excess with a clean cloth after applying. |
| Skipping the sanding step | Not sanding the wood properly can lead to an uneven finish and poor stain adhesion. | Always sand the wood with 120-220 grit sandpaper before applying stain. |
| Applying the topcoat too soon | Applying the topcoat before the stain is fully dry can cause the finish to look cloudy or uneven. | Wait at least 24 hours after the final stain coat before applying the topcoat. |
| Not cleaning the wood before staining | Dust and debris on the wood can cause the stain to look bumpy or uneven. | Use a tack cloth to clean the wood after sanding to remove any dust or particles. |
Related: Diy wood staining basics step by step techniques
Quick Wood Staining Basics Step
Related: Wood staining basics step checklist
Enhancing Wood Grain with Stain Techniques
Highlighting the grain in your wood can transform a simple project into something extraordinary. I've found that using a gel stain rather than a liquid stain gives better control over the grain. Gel stain sits on the surface longer, allowing you to work the color into the grain for a more defined look. I particularly enjoy using it on live-edge slabs, where the grain is so prominent. Gel stain also reduces the risk of blotchiness because it doesn't pool in the open pores.
Another technique I've used is staining in the direction of the grain. This method helps the stain flow more naturally and enhances the grain pattern. I always start from one end and move toward the other, making sure I'm not going against the grain, which can cause streaks. I've also experimented with using a brush with natural bristles, which seems to work better than synthetic brushes for this technique. Natural bristles hold more stain and distribute it more evenly.
For a more dramatic effect, I've tried using a wood dye before applying the stain. Dye penetrates deeper into the wood, creating a more vibrant base for the stain. I mix the dye with water and apply it with a brush, letting it sit for about 10 minutes before wiping off the excess. This technique has given me a richer, more defined finish on my projects. I've used this method on oak and maple, and the results have been consistently impressive.
Troubleshooting Common Staining Issues
Learn how to fix blotchiness, uneven color, and drying problems with practical solutions tested in real DIY projects.
I've encountered blotchiness more than once, especially with open-pore woods like oak. The fix? Apply a wood conditioner like Minwax Pre-Stain Wood Conditioner before staining. This step takes about 15 minutes and costs around $10 for a 16-ounce bottle. It evens out absorption and prevents the wood from sapping the stain in some areas, leaving a uniform finish.
If the stain dries too quickly or doesn't absorb evenly, check your humidity levels. I found that working in a space with 40-50% humidity, using a hygrometer to monitor, gives the best results. If the air is too dry, the stain can dry on the surface before it soaks in, leading to a thin, patchy look. A small fan can help circulate air without over-drying the wood.
Another issue I've faced is over-staining, which results in a dark, unnatural look. To avoid this, always test on a scrap piece of wood first. I've also found that applying two thin coats of stain, allowing each to dry for 2-3 hours, works better than one thick coat. This method ensures even coverage and a more natural wood tone.
Common Questions
Can I stain wood without sanding it first?
What type of brush should I use for staining?
How many coats of stain should I apply?
Can I use the same stain on both hardwood and softwood?
References
- (PDF) Fasga: A new polychromatic method for simultaneous and ... (academia.edu)
- BAAQMD Regulation 8, Rule 32 (baaqmd.gov)
- Woodworking and Cabinetmaking Program | Bakersfield College (bakersfieldcollege.edu)
- Analytical staining of cellulosic materials: A Review - BioResources (bioresources.cnr.ncsu.edu)
Cite this guide
Stainlane (2026). Quick Wood Staining Basics Step. https://stainlane.com/quick-wood-staining-basics-step/
Feel free to cite or share this guide.