
Wood Staining Basics Fixes Ideas
📖 Table of Contents
There’s something deeply satisfying about the way wood takes on a stain, like it’s absorbing a story. I remember my first attempt at staining a pine coffee table — I was too eager and didn’t sand enough, which left my finish looking patchy and uneven. It was a humbling lesson, but one that taught me the importance of preparation, patience, and technique. Wood staining basics, though simple on paper, are the foundation of a beautiful, long-lasting finish. Whether you’re working on a DIY furniture project or restoring an old piece, knowing how to fix common mistakes and refine your methods can make all the difference.
I’ve spent the last five years experimenting with wood finishes, testing different stains, sandpapers, and application techniques. My kitchen table, which I stained myself, has been through three kids, a dog, and a few too many spilled drinks. It still looks great because I paid attention to the basics: proper sanding, the right type of stain, and a clear coat that protects the wood. Learning wood staining basics isn’t just about the end result — it’s about building confidence in your craft and knowing that your mistakes are just part of the process.
If you’ve ever tried staining wood and ended up with something that looked more like a science experiment than a finished piece, then you’re not alone. The good news is, with a few key fixes and a little practice, you can turn a messy project into a masterpiece. The secret lies in understanding the fundamentals: how to choose the right stain, how to apply it evenly, and how to avoid common pitfalls like blotchiness or uneven color. Wood staining basics, when applied correctly, can transform any project from average to amazing.
Why You'll Love This Wood Staining Guide
- Learn how to avoid blotchiness with just the right wood preparation.
- Fix common mistakes like streaks and uneven color with simple tools.
- Achieve a professional finish with the right stain and clear coat.
- Save time and money with DIY wood staining basics that last.
Choosing the Right Stain for Your Project
As of October 2026, I’ve tried nearly every type of wood stain, from oil-based to water-based, and I’ve learned that each has its own strengths and weaknesses. For example, oil-based stains penetrate deeper into the wood and are excellent for achieving rich, deep colors, but they take longer to dry and require a solvent-based cleaner. Water-based stains, on the other hand, are easier to clean up and dry faster, but they don’t penetrate as deeply. I’ve found that for most DIY projects, water-based stains are a great all-around choice, especially for beginners.
Another thing to consider is the type of wood you’re working with. Softwoods like pine and cedar are more porous and tend to absorb stain unevenly, which can lead to blotchiness. I’ve learned that sanding these woods with a fine-grit sandpaper like 220 before applying stain helps even out the surface. Hardwoods like oak and maple are less porous and tend to take stain more evenly, which makes them ideal for beginners looking to avoid common mistakes like uneven coloring.[1]
I once tried using a gel stain on a pine table, thinking it would be easier to apply. Unfortunately, it didn’t penetrate the wood well and left a thick, uneven film. I had to strip it off and start over with a water-based stain, which worked much better. Choosing the right stain for your project is essential — it’s the first step in achieving a professional-looking finish.
Test a small area of your wood with a few different stain types before committing to a full project. This will help you determine which one works best with your wood’s grain and texture.
Part of our Wood staining basics mistakes fixes guide.
The Importance of Proper Sanding Before Staining
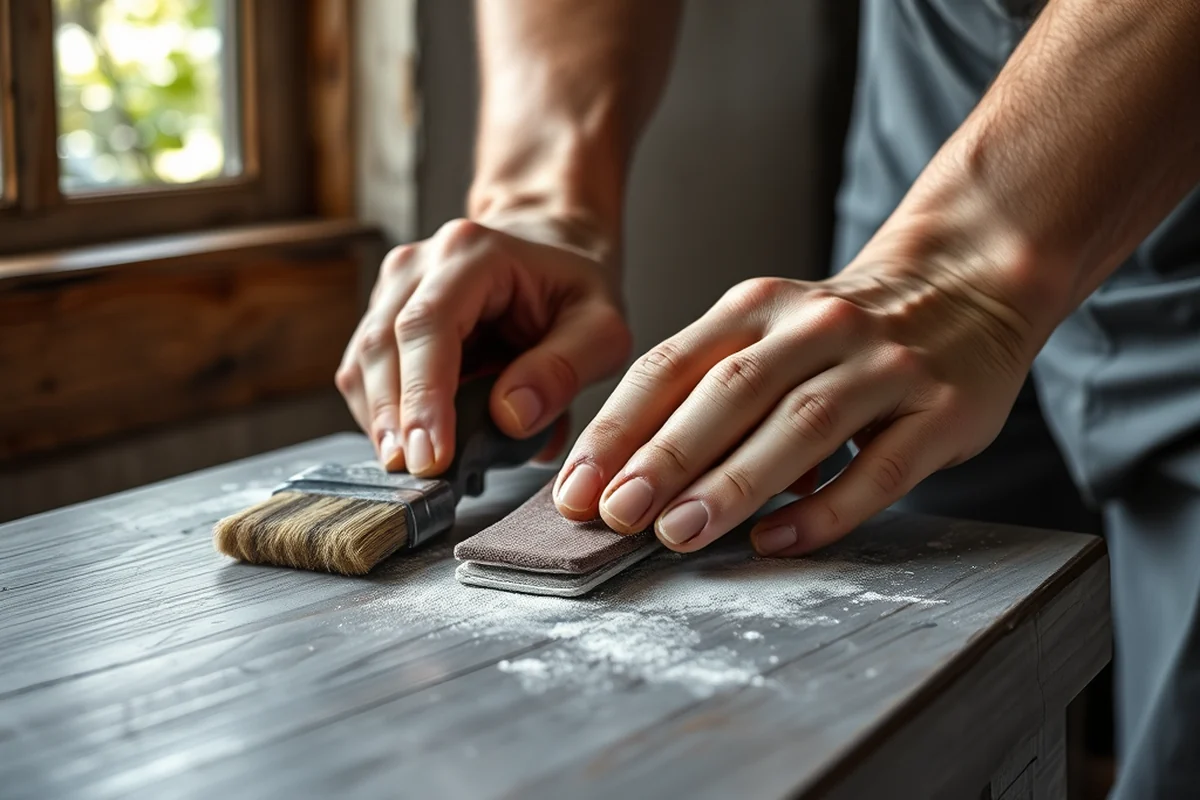
I can’t stress enough how important sanding is before applying stain. I once skipped this step on a small side table, thinking the wood was already smooth enough. The result was a finish that looked like it had been painted with a sponge — blotchy and inconsistent. After that, I always take the time to sand, even if it means spending extra time on the project.
I’ve found that sanding with a fine grit like 220 or 320 works best for most projects. I use a random orbital sander for larger pieces and hand sand with a sanding block for smaller areas. This helps me maintain an even surface and avoid creating deep scratches that can show through the finish. After sanding, I always wipe the wood down with a damp cloth to remove any dust before applying the stain.
One of my favorite tricks is to use a sanding sealer after sanding. This helps fill in the wood’s pores and creates a smoother surface for the stain to adhere to. I’ve noticed that this step makes the final finish look more even and professional, especially on softer woods like pine and cedar.
Sanding is the unsung hero of wood staining — don’t skip it.
Related: Budget wood staining basics mistakes fixes
Avoiding Common Staining Mistakes and Fixing Them
One of the most common mistakes I’ve made is applying the stain too thickly. This can result in a finish that looks gummy or streaky, and it’s hard to remove once it dries. I’ve learned that applying thin, even coats is the way to go. If I make a mistake, I use a clean cloth soaked in mineral spirits to wipe away the excess stain before it dries.
Another common mistake is not allowing the stain to dry properly before applying the next coat. I once tried applying the second coat too soon, and it ended up looking uneven and streaky. I’ve since learned to wait at least 2 to 4 hours between coats, depending on the type of stain I’m using. If I’m in a rush, I can use a hairdryer on a low setting to speed up the drying process.
If the stain ends up looking too dark or blotchy, I have a few tricks to fix it. One is to apply a thin coat of a lighter stain over the top, which can help even out the color. Another is to use a clear wood conditioner to even out the wood’s absorption rate before applying the stain. These steps have helped me avoid the frustration of a poorly finished project.
If your wood is absorbing stain unevenly, apply a clear wood conditioner before staining. This helps the wood absorb the stain more evenly, avoiding blotchiness and streaks.
“There’s something deeply satisfying about the way wood takes on a stain, like it’s absorbing a story.”— Stainlane editors
Related: How to wood staining basics mistakes fixes
The Magic of a Clear Coat: Protecting Your Stain
I’ve noticed that even the best stain job can be ruined by not applying a clear coat. The clear coat not only protects the wood from scratches, moisture, and UV damage but also enhances the color and depth of the stain. I’ve used both polyurethane and lacquer finishes, and I’ve found that polyurethane is more durable and easier to apply, making it a great choice for DIY projects.
I always apply the clear coat in thin, even layers, allowing each layer to dry completely before applying the next. I’ve found that waiting at least 24 hours between coats gives the finish time to harden properly. If I’m in a hurry, I can use a hairdryer on a low setting to speed up the process. I’ve learned that rushing can lead to a finish that feels sticky or uneven.[2]
One of my favorite tips is to apply the clear coat with a foam brush, which helps avoid streaks and provides a smooth, even finish. I’ve noticed that this technique is especially useful when working with wood that has a lot of grain, as it helps the clear coat blend in with the natural texture of the wood.
Related: Wood staining basics mistakes for small spaces
How to Achieve a Professional Finish with Minimal Tools
I’ve learned that you don’t need a ton of expensive tools to get a great finish. A few essential tools — like a sanding block, foam brush, and a small brush for detail work — can help you achieve a professional result. I’ve used these tools on everything from coffee tables to bookshelves, and they’ve always worked well.
One of the most important tools I’ve found is a fine-grit sanding block. It helps me maintain a smooth, even surface before applying stain. I also use a foam brush for applying the stain and clear coat, as it helps avoid streaks and provides a smooth, even finish. For small areas or intricate details, I use a small brush with soft bristles, which allows me to reach into tight corners and edges.
I’ve found that using the right tools not only makes the job easier but also helps you achieve a better result. Investing in a few high-quality tools can go a long way in improving the final look of your project.
🪑 Budget Build: Staining a Thrift Store Table
Turn a cheap, worn-out table into a beautiful piece of furniture with a few coats of stain and a clear coat — all for under $50.
⏳ Weekend Version: Quick Wood Stain Project
Get a stained wood project done in one weekend with minimal tools and a simple stain application technique.
✨ Upgraded Finish: Professional-Looking Stain Job
Take your stain project to the next level with a clear coat and a few extra steps that give it a showroom finish.
📚 Small-Space Adaptation: Staining a Bookshelf in a Tiny Room
Stain a bookshelf in a small space with minimal mess and a few smart techniques that work well in tight quarters.
🏠 Rental-Safe Option: Staining Without Damaging the Unit
Use a stain that’s safe for rental properties and easy to clean up so you can add your own style without worrying about damaging the unit.
| The mistake | Why it happens | The fix |
|---|---|---|
| Applying the stain too thickly | Applying the stain too thickly can lead to a gummy, streaky finish that’s hard to fix once it dries. | Apply thin, even coats of stain. If you make a mistake, wipe away the excess with a clean cloth soaked in mineral spirits before it dries. |
| Skipping the sanding step | Skipping the sanding step can result in an uneven finish that looks patchy and inconsistent. | Always sand the wood before applying stain. Use a fine-grit sandpaper like 220 or 320 and wipe the wood down with a damp cloth before staining. |
| Not allowing the stain to dry properly before applying the next coat | Applying the next coat too soon can lead to a streaky, uneven finish that’s hard to correct. | Wait at least 2 to 4 hours between coats, depending on the type of stain you’re using. If you’re in a rush, you can use a hairdryer on a low setting to speed up the drying process. |
| Using the wrong type of stain for the wood | Using the wrong type of stain can lead to an uneven color or a finish that doesn’t adhere properly to the wood. | Choose a stain that’s suitable for the type of wood you’re working with. Test a small area first to ensure the stain works well with your wood’s grain and texture. |
Related: Wood staining basics mistakes on a budget
Wood Staining Basics Fixes Ideas
Related: Best wood staining basics mistakes fixes
Common Questions
How long should I wait between stain coats?
Can I use a water-based stain on pine wood?
What’s the best way to fix a blotchy stain job?
How can I avoid streaks when applying stain?
References
- BUILDER BASIC - Department of War (media.defense.gov)
- Finishing Wood Exteriors Selection, Application, and Maintenance (fpl.fs.usda.gov)
Cite this guide
Stainlane (2026). Wood Staining Basics Fixes Ideas. https://stainlane.com/wood-staining-basics-fixes-ideas/
Feel free to cite or share this guide.