
* Deck Staining
📖 Table of Contents
I remember the first time I stained my deck — it felt like the difference between a tired, weathered porch and a space that suddenly felt alive. The wood had been neglected for years, and after a few hours of scraping, sanding, and applying stain, it gleamed like new. Stain wasn’t just a coat of color; it was a way to breathe life into the structure of my home. It was something I could do myself, without hiring a crew or breaking the bank.
Deck staining isn’t just about aesthetics; it’s about protection. A properly stained deck can last 5–10 years longer than one that’s left to the elements. I’ve seen this firsthand, with my own deck holding up through rain, snow, and summer sun without significant wear. The process is straightforward, but it requires attention to detail — from preparation to the final coat, every step matters.[1]
What I love about deck staining is that it’s a project that anyone can tackle, even if you’re new to DIY. You don’t need a degree in carpentry or a professional-grade toolset. With the right materials and a few hours on the weekend, you can transform your outdoor space into something beautiful and functional — and the satisfaction of doing it yourself is immeasurable.
Why You'll Love This Deck Staining Guide
- Protects your deck from rot, mold, and fading for years to come
- Boosts the value of your home with a well-maintained exterior
- Saves you hundreds of dollars compared to hiring professionals
- Gives you the satisfaction of doing a complex project yourself
Choosing the Right Stain for Your Deck
As of November 2026, I always start by evaluating the type of wood on my deck — cedar, pressure-treated pine, or composite. Each wood type reacts differently to stains. For example, cedar is naturally resistant to rot, but it benefits from a penetrating stain that enhances its grain. Pressure-treated pine requires a stain with UV protection to prevent fading, while composite decks often need a stain specifically formulated for synthetic materials.
I’ve found that oil-based stains are more durable and weather-resistant, but they take longer to dry. Water-based stains, on the other hand, are easier to clean up and dry faster, but they may not last as long. I always test a small area first to see how the stain interacts with the wood and how it looks in different lighting conditions.
Once you choose your stain, it’s important to read the manufacturer’s instructions. Most high-quality stains require two to three coats for full protection. I’ve seen firsthand how a properly applied stain can make a worn-out deck look brand new, with a rich, even finish that lasts through the seasons.
Make sure the stain is suitable for your specific type of wood and weather conditions. Some stains are designed for interior use only and won’t hold up to rain or sun.
Part of our Wood staining basics guide.
Preparing Your Deck for Staining

I start by pressure washing the deck with a deck cleaner to remove dirt, algae, and old sealant. I use a power washer with a 2,500 PSI setting — it’s enough to clean the surface without damaging the wood. After washing, I let the deck dry completely, which can take up to two days if it’s been rained on recently.[2]
Next, I sand the deck with a coarse-grit sandpaper, around 40–60 grit, to smooth out any rough spots and remove the top layer of old stain. I focus on areas that have splintered or cracked wood, as these can trap stain and cause uneven coverage. After sanding, I sweep the deck thoroughly to remove dust and debris.[3]
It’s important to do this step carefully — if the wood is too wet or not properly cleaned, the stain won’t adhere well. You’ll end up with a patchy or peeling finish. I’ve learned this the hard way, once when I rushed the process and had to redo the entire deck the next day.
Clean wood is the foundation of a perfect stain job.
Related: Make wood stain list
Applying the Stain: Technique and Timing
I use a long-nap roller for large, flat areas and a small brush for edges, corners, and railings. I start with the longest areas first, working from the top of the deck down to avoid stepping on wet stain. I apply the first coat of stain, making sure it’s even and not too thick. I wait 10–15 minutes, then apply the second coat with the same technique.[4]
Timing is everything. I always stain on a dry day with temperatures between 50°F and 90°F. If it’s too hot, the stain can dry too quickly, leading to a blotchy finish. If it’s too cold, the stain might not cure properly, causing peeling. I’ve learned to check the weather forecast ahead of time to avoid these issues.
After applying the final coat, I let the stain cure for at least 24 hours before walking on it. I’ve noticed that patience pays off — the stain sets better and lasts longer if I don’t rush the drying process. The result is a smooth, even finish that looks like it was done by a professional.
A long-nap roller covers more surface area and applies stain more evenly than a short-nap one. It also helps prevent streaks and uneven application.
“I remember the first time I stained my deck — it felt like the difference between a tired, weathered porch and a space that suddenly…”— Stainlane editors
Related: Wood staining basics ideas
Maintaining Your Stained Deck
I clean my deck at least once a year with a deck cleaner and a pressure washer. I avoid using harsh chemicals that can strip the stain or damage the wood. If I notice any areas where the stain is fading or peeling, I sand those spots down and reapply a coat of stain to maintain the finish.
During the winter, I cover my deck with a breathable tarp to prevent snow and ice from sitting on the surface. This helps reduce the risk of water seeping into the wood and causing rot. I also make sure to remove any debris, like leaves or branches, that might accumulate on the deck during the fall.
I’ve learned that maintenance is often more time-consuming than the initial staining, but it’s necessary for the deck to last. A well-maintained deck can last up to 10 years with proper care, and I’m happy to spend a few hours each season to ensure that happens.
Related: Prepare wood for staining without tools
Avoiding Common Deck Staining Mistakes
One of the biggest mistakes I see is applying too much stain. It’s tempting to think more is better, but too much can lead to a splotchy, uneven finish. I always apply thin, even coats and wait for each one to dry before applying the next. This ensures that the stain adheres properly and doesn’t pool in unwanted areas.
Another common mistake is not cleaning the deck thoroughly before staining. If there’s dirt, mold, or old sealant on the surface, the stain won’t bond properly, and the finish will be inconsistent. I always take the time to clean the deck with a pressure washer and let it dry completely before proceeding.
I also see people trying to stain on a rainy day or in direct sunlight. This can cause the stain to dry too quickly or not at all, leading to poor results. I’ve found that the best time to stain is on a dry, overcast day with moderate temperatures.
Related: Easy wood staining basics
Choosing the Right Tools for the Job
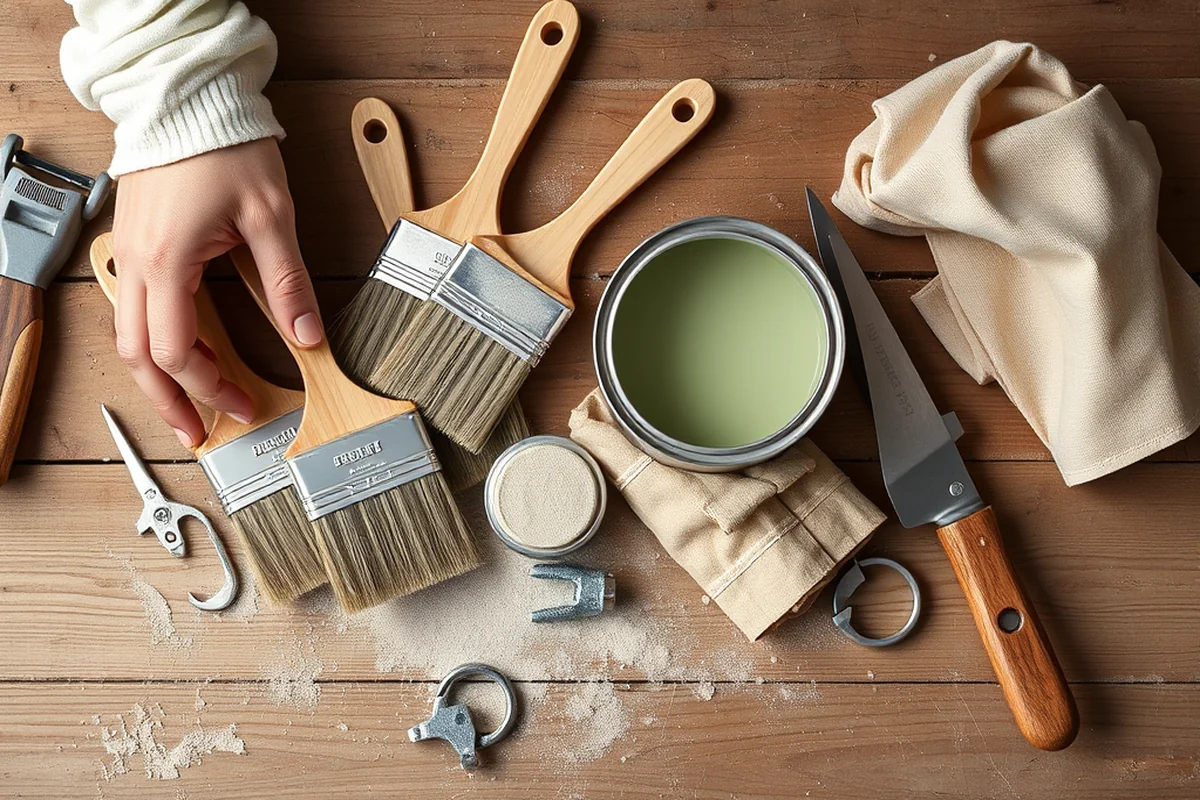
I always use a long-nap roller for large, flat areas and a small brush for edges and hard-to-reach spots. I also have a few different sizes of brushes on hand, from 1-inch to 4-inch, to handle different tasks. The right brush can help you apply stain more precisely and avoid streaks or missed spots.
For sanding, I use a 40–60 grit sandpaper to smooth out the wood and remove old stain. I’ve found that a random-orbit sander makes the job faster and easier, especially for larger decks. I always wear a mask when sanding to avoid breathing in wood dust.
I also use a paint tray with a roller extension to hold the stain and keep it off the ground. This helps me apply the stain more evenly and avoid dripping or pooling. Using the right tools not only makes the job easier but also ensures a professional-looking finish.
The right tools can turn a messy job into a smooth, even finish.
Related: Properly wood stain printable
The Rewards of a Stained Deck
After staining my deck, I noticed an immediate improvement in its appearance. The wood looked fresh, and the colors were vibrant. I was amazed at how much the deck had transformed — it was like a completely new space.
Over time, I’ve seen how a stained deck holds up better against the elements. The wood doesn’t fade as quickly, and it doesn’t warp or crack as easily. I’ve also noticed that people visiting my home often compliment the deck, which is a nice bonus.
Beyond the aesthetic improvements, I’ve also seen a difference in the way my home feels. A stained deck is more inviting, and I’ve spent more time outside, enjoying the space. It’s a small investment that has paid off in both beauty and comfort.
💰 Budget Build
Use affordable, water-based stains and basic tools to achieve a clean, protected deck without overspending.
⏰ Weekend Version
Complete the entire deck staining process in one weekend with a focused, efficient approach.
✨ Upgraded Finish
Enhance your deck with a high-quality oil-based stain and a professional-grade roller for a showroom finish.
🏠 Small-Space Adaptation
Tailor the staining process for smaller decks by focusing on key areas and using lighter tools.
🚪 Rental-Safe Option
Use temporary, easy-to-apply stain that won’t damage rental property and can be removed without residue.
| The mistake | Why it happens | The fix |
|---|---|---|
| Applying too much stain | Excess stain can cause a splotchy, uneven finish and may not dry properly. | Apply thin, even coats and wait for each coat to dry before applying the next. |
| Staining in direct sunlight | The sun can cause the stain to dry too quickly, leading to a poor finish. | Choose a day with overcast skies and moderate temperatures for staining. |
| Not cleaning the deck before staining | Dirt, algae, and old sealant can prevent the stain from adhering properly. | Pressure wash the deck and let it dry completely before proceeding. |
| Using the wrong type of stain for the wood | Different woods require different types of stain to achieve the best results and protection. | Check the manufacturer’s recommendations and choose a stain suitable for your type of wood. |
* Deck Staining
Common Questions
What is the best time of year to stain a deck?
Can I stain my deck if it’s still wet from rain?
Do I need to sand my deck before staining?
How long does deck stain typically last?
References
- Wood Destroying Pest Management (ag.utah.gov)
- Bridge Structure Maintenance and Rehabilitation Repair Manual (dot.ga.gov)
- PART III Special Provisions to the Oregon Standard Specifications (bendoregon.gov)
- Technical Guidance for Rcra/cercla Final Covers Draft - epa nepis (nepis.epa.gov)
Cite this guide
Stainlane (2026). * Deck Staining. https://stainlane.com/deck-staining/
Feel free to cite or share this guide.