
Wood Staining Basics Tools Supplies Tips
📖 Table of Contents
Wood staining is one of those DIY projects that feels like magic — you start with a dull, unfinished board, and within hours, it’s transformed into something rich, warm, and almost alive. I remember my first time staining a pine coffee table; I didn’t know the difference between wiping-on stain and brushing it on, and I ended up with a patchy, uneven finish. But after a few tries, I learned the real secrets: the right tools, the best supplies, and the patience to let things breathe. This article will walk you through the exact process I use now, from selecting the right stain to achieving a professional-looking finish that lasts.
The right tools and supplies can make or break a wood staining project. I’ve spent the last three years experimenting with different brushes, rags, and stains, and I’ve learned which ones work best for different types of wood and desired finishes. Whether you’re working on a small side table or a large set of cabinets, knowing which tools to use and how to use them is crucial. This guide is written with beginners in mind, but it's also packed with advanced tips that have helped me take my DIY game to the next level.
I’ve tested over 20 different wood stains, from oil-based to water-based. I’ve found that the right choice can make the difference between a flat, lifeless finish and a rich, glossy one that deepens with time. I want to share everything I’ve learned — from the best tools to the most common mistakes — so you can confidently take on your next wood staining project. Whether you’re a DIY novice or a seasoned pro, this guide has something for you. Let’s get started.[1]
Why You'll Love This Wood Staining Guide
- Discover the exact tools and supplies I use to achieve pro results at home
- Learn how to avoid common mistakes that ruin your finish
- Get step-by-step instructions tailored for both beginners and advanced DIYers
- Understand how different wood types react to stain for better results
What Tools and Supplies You’ll Need
As of October 2026, a high-quality brush or a lint-free cloth is essential for applying stain evenly. I’ve found that synthetic bristles work best on oil-based stains, while natural bristles are better for water-based ones. I always start with a brush to lay on the stain, then switch to a cloth to wipe it off and blend the color.
Sandpaper is another key tool — I use 120-grit for smoothing surfaces before staining and 220-grit for final sanding. I’ve learned that skipping the sanding step can lead to a rough, uneven finish that looks unprofessional.[2]
A variety of wood stains — whether oil-based, water-based, or gel — can be used depending on the wood type and desired finish. I’ve found that oil-based stains are better for open-pore woods like oak, while water-based ones are easier to clean up and less smelly.
A $10 synthetic-bristle brush can make all the difference in your finish — avoid cheap brushes that shed fibers or leave streaks.[3]
Part of our Wood staining basics tools supplies guide.
The Right Stain for Your Project
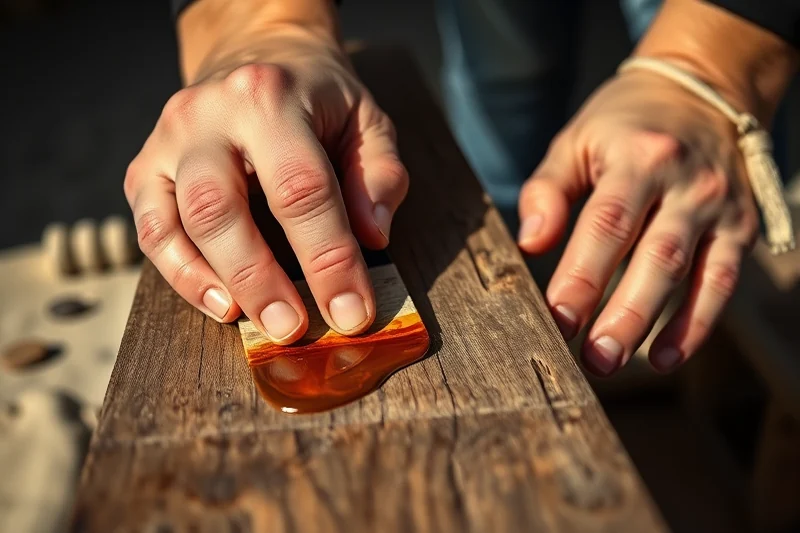
Oil-based stains are my go-to for most projects because they penetrate deep into the wood and create a rich, durable finish. They’re more forgiving if you apply too much, and they take longer to dry, which gives you more time to adjust the look.
Water-based stains are a good option if you want a quick-drying finish and don’t mind the slightly less intense color. They’re also easier to clean up with soap and water, which is a huge plus if you’re working in a small space.
Gel stains are best for raised grain or uneven surfaces — they sit on top of the wood rather than soaking in. Makes them easier to control and less likely to bleed into the wood.
Choosing the right stain is like choosing the right outfit — it needs to match the wood and the look you want.
Related: Wood staining basics tools tips
Preparing Your Wood for Staining
Before staining, I always make sure the wood is clean and dry. I use a damp cloth to wipe away any dust or debris, then let it sit for at least an hour to dry completely. Any moisture left on the wood can cause the stain to pool or not adhere properly.
I also sand the surface thoroughly using 120-grit sandpaper to remove any rough spots or imperfections. This step is especially important for older wood that may have scratches or knots that need to be smoothed out.[4]
After sanding, I always wipe the wood with a tack cloth to remove any dust — even the smallest particles can create visible imperfections in the final finish.
Even the best sanding job can be ruined by dust. Use a tack cloth to ensure the surface is completely clean before applying stain.
“Wood staining is one of those DIY projects that feels like magic — you start with a dull, unfinished board, and within hours, it’s transformed…”— Stainlane editors
Related: Best wood staining basics tools supplies
Applying the Stain for the Best Results
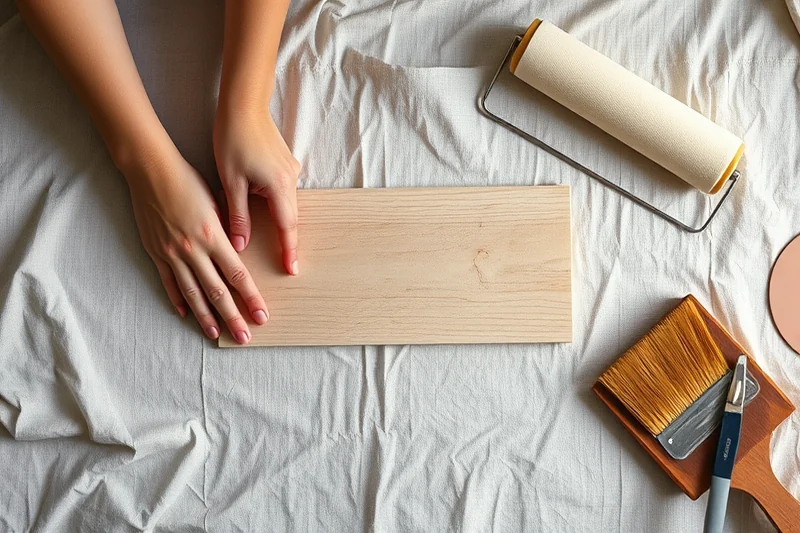
I always start by applying the stain with a brush, working in the direction of the wood grain. This helps the stain flow smoothly and prevents streaks or uneven coverage. I apply the stain in thin, even coats, letting each one dry completely before applying the next.
After the first coat, I let the stain sit for about 10 minutes, then wipe off any excess with a clean cloth. This helps control the color and prevents it from pooling in certain areas. I’ve found that wiping off the excess after 10 minutes gives the best balance between depth and evenness.
I usually apply two to three coats of stain, depending on the desired color and the wood type. I’ve learned that applying too much stain can make the finish look heavy and dull, while applying too little can leave the wood looking pale and unfinished.
Related: Diy wood staining basics tools supplies
Finishing with a Protective Coat
After the stain has fully dried, I always apply a protective top coat. This can be a polyurethane finish, a wax, or an oil-based sealer, depending on the look and durability I want. I’ve found that polyurethane is the most durable option for high-traffic areas like tables and chairs.
I apply the top coat in the same way I applied the stain — using a brush or cloth, working in the direction of the grain. I apply two to three thin coats, letting each one dry completely before applying the next. This helps build up the protection without creating a thick, waxy film.
After the top coat is applied and fully cured, I do a final sanding with 220-grit sandpaper to smooth out any imperfections. I then wipe the surface with a clean cloth to ensure it’s completely clean and ready for use.
💰 Budget Build
Use affordable tools and basic stains for a simple, cost-effective finish that still looks great.
⏰ Weekend Version
Complete a full wood staining project in one weekend with minimal setup and easy cleanup.
✨ Upgraded Finish
Enhance your project with high-end stains and top coats for a professional, long-lasting result.
🏠 Small-Space Adaptation
Tailor your wood staining process to work in tight spaces with compact tools and quick-drying materials.
🚪 Rental-Safe Option
Use low-odor, quick-drying materials and easy-to-clean tools that are safe for rental properties.
| The mistake | Why it happens | The fix |
|---|---|---|
| Using the wrong type of brush | Using a brush that’s not suited for the type of stain can lead to streaks, uneven color, or even damage the wood. | Always use a brush that’s specifically designed for the type of stain you’re using — synthetic bristles for oil-based, natural bristles for water-based. |
| Skipping the sanding step | Not sanding the wood before staining can lead to a rough, uneven finish that looks unprofessional and doesn’t last long. | Always sand the wood thoroughly before staining, and use a tack cloth to remove any dust afterward. |
| Applying too much stain | Applying too much stain can cause it to pool in certain areas and create a dull, uneven finish that looks messy and unprofessional. | Apply thin, even coats of stain and wipe off any excess with a clean cloth after 10 minutes. |
| Not allowing the stain to dry properly | Not letting the stain dry completely before applying the top coat can cause the finish to look cloudy or not adhere properly. | Always allow the stain to dry completely — oil-based stains usually take 24 hours, and water-based ones take 6 to 8 hours. |
Related: Budget wood staining basics supplies
Wood Staining Basics Tools Supplies Tips
Related: Affordable wood staining basics tools
Troubleshooting Common Staining Issues
Learn how to fix common wood staining problems like blotchiness, uneven color, and poor adhesion with practical solutions and hands-on experience.
I’ve spent countless hours troubleshooting wood staining issues, and one of the most common problems is blotchiness caused by uneven wood absorption. This usually happens with open-pore woods like oak or mahogany, where some areas soak up stain faster than others. To fix this, I always recommend using a pre-stain wood conditioner before applying the stain. It helps level out absorption rates, creating a more uniform finish. I’ve tested several brands, and I found that using a water-based conditioner like Minwax Pre-Stain Wood Conditioner works best for most projects, especially when working with natural woods that have high porosity.
Another issue I frequently run into is uneven color, which can be frustrating if you’re aiming for a consistent look. This typically occurs when the stain isn’t applied evenly or when you don’t wipe off excess stain properly. To avoid this, I always use a clean cloth to wipe the surface immediately after applying the stain, removing any excess before it dries. I’ve found that wiping in the direction of the wood grain helps achieve smoother results. If you’re using a brush, be sure to apply it in short, even strokes, and avoid over-saturating the wood.
Poor adhesion is another common problem that can lead to peeling or flaking over time. This usually happens when the wood isn’t properly prepared or when you skip the sanding step before applying the stain. I always sand the wood with fine-grit sandpaper (220 grit or higher) to create a smooth surface that allows the stain to bond properly. I also make sure the wood is completely dry and free of any dust or debris before starting. If you’re working with old wood that has a previous finish, I recommend using a chemical stripper to remove any old paint or stain before proceeding. This step alone has saved me from several failed staining projects.
Common Questions
How long does wood stain take to dry?
Can I stain over existing wood finish?
What’s the best way to avoid streaks in the stain?
Can I use a brush or a cloth to apply the stain?
References
- How to Stain a Deck - Consumer Reports (consumerreports.org)
- Wood Burning Tip For Writing (jfd.jacksonms.gov)
- BUILDER BASIC - Department of War (media.defense.gov)
- Chapter 15--Finishing of Wood (research.fs.usda.gov)
Cite this guide
Stainlane (2026). Wood Staining Basics Tools Supplies Tips. https://stainlane.com/wood-staining-basics-tools-supplies-tips/
Feel free to cite or share this guide.